Working with Audio Clips
Every recording you make — and every file you import — becomes a clip on the timeline. This page covers everything you can do with audio clips: moving them, trimming them, editing them, and more.
Anatomy of a Clip
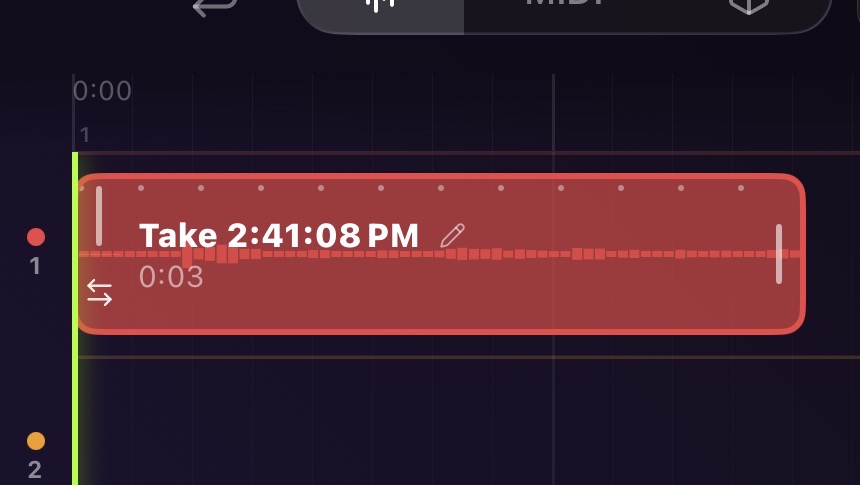
| Part | Description |
|---|---|
| Waveform | A preview of the audio amplitude. Peaks show louder moments. |
| Clip name | The name of the take or imported file, shown in the top-left of the clip |
| Duration | Shown below the clip name (e.g. “0:12”) — this is the effective duration after any trimming |
| Left handle | Drag the upper-left handle to trim the clip’s start point |
| Move handle | Drag the arrows icon (lower-left) to slide the whole clip left or right in time |
| Right handle | Drag the right edge to trim the clip’s end point |
| ✏️ edit button | Tap the pencil icon to open the Clip Edit modal |
Moving a Clip
To move a clip along the timeline, use the ⇄ arrows handle at the lower-left of the clip. Drag left or right.
When you release, the clip snaps to the nearest 8th-note beat at the current BPM. This keeps your clips grid-aligned automatically.
Tip: To do a precise move without snap, open the Clip Edit modal (long-press or tap the ✏️ icon) and adjust the position numerically.
Tapping a clip (not the handles) seeks the playhead to the clip’s start position.
Long-pressing a clip opens the Clip Edit modal directly.
Trimming a Clip
Trimming non-destructively hides audio at the beginning or end of a clip. The original audio is always preserved — you can restore the full length at any time.
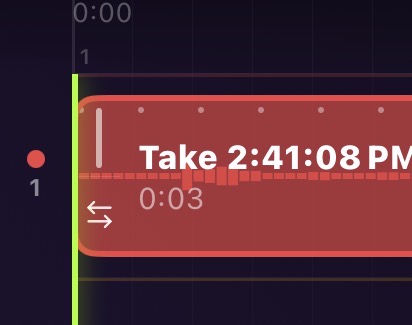
Trimming the Start (IN point)
Drag the top-left handle (shows a grip bar) to the right to hide the beginning of the clip.
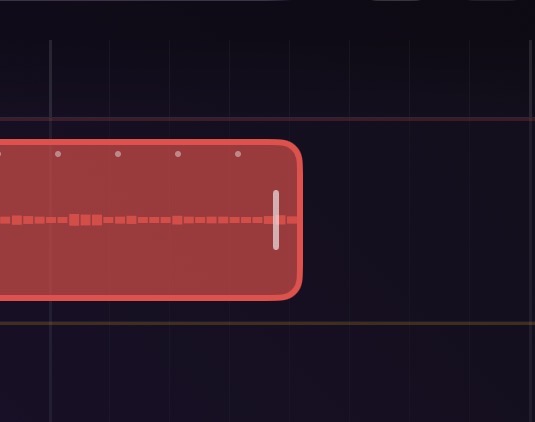
Trimming the End (OUT point)
Drag the right-edge handle to the left to hide the end of the clip.
Snap-to-Measure on the Right Handle
When you drag the right handle near a measure boundary, it snaps and holds for 600 ms before you can drag past. This makes it easy to set an OUT point exactly on a bar line.
The Clip Edit Modal
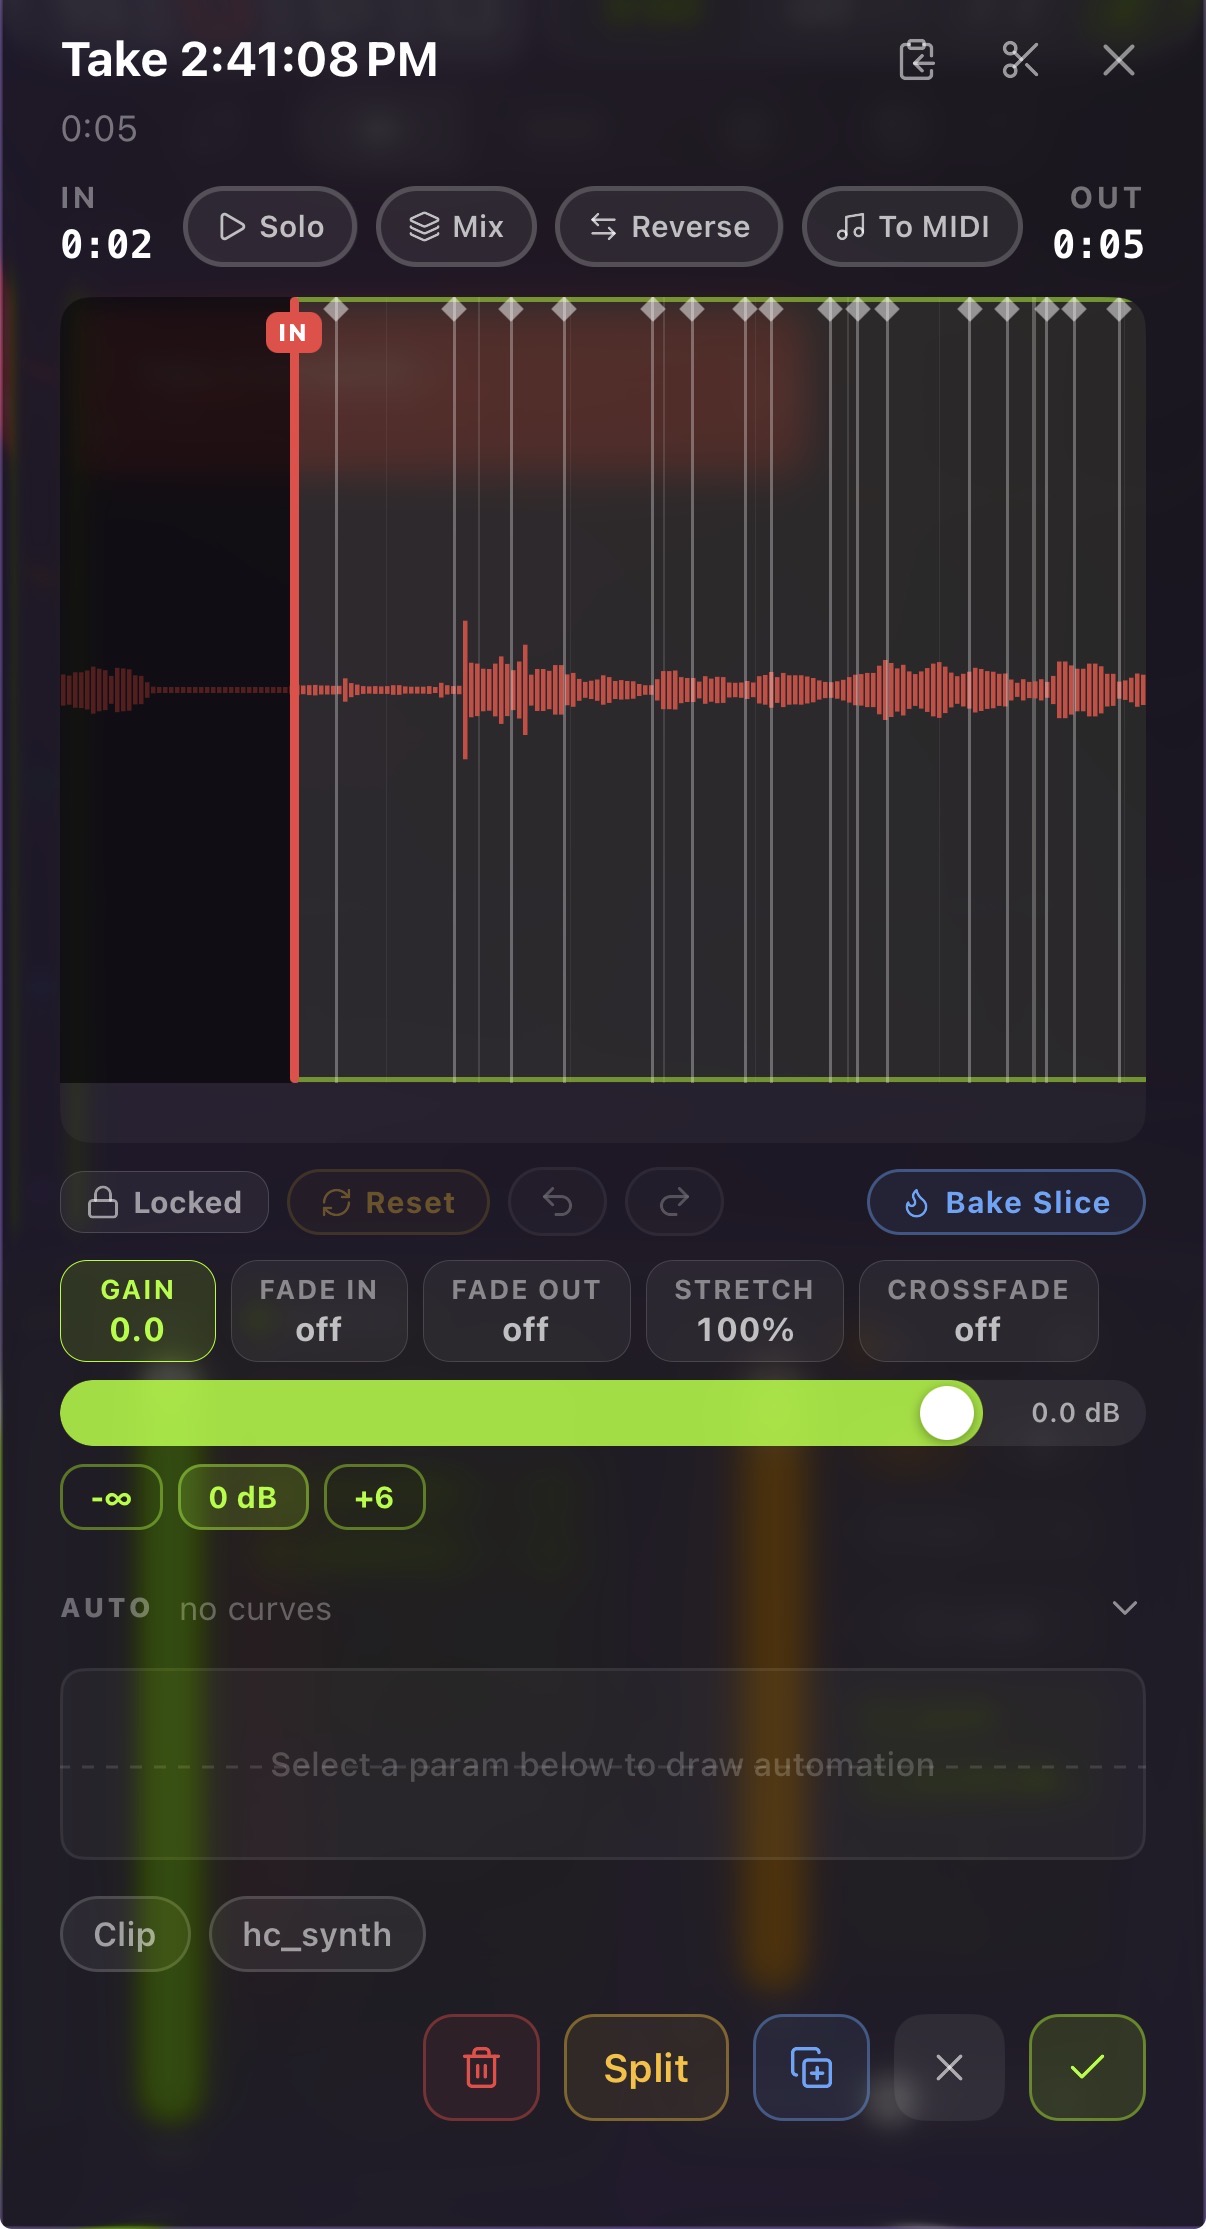
For precision editing, long-press any clip (or tap the ✏️ pencil icon) to open the Clip Edit modal.
Waveform View
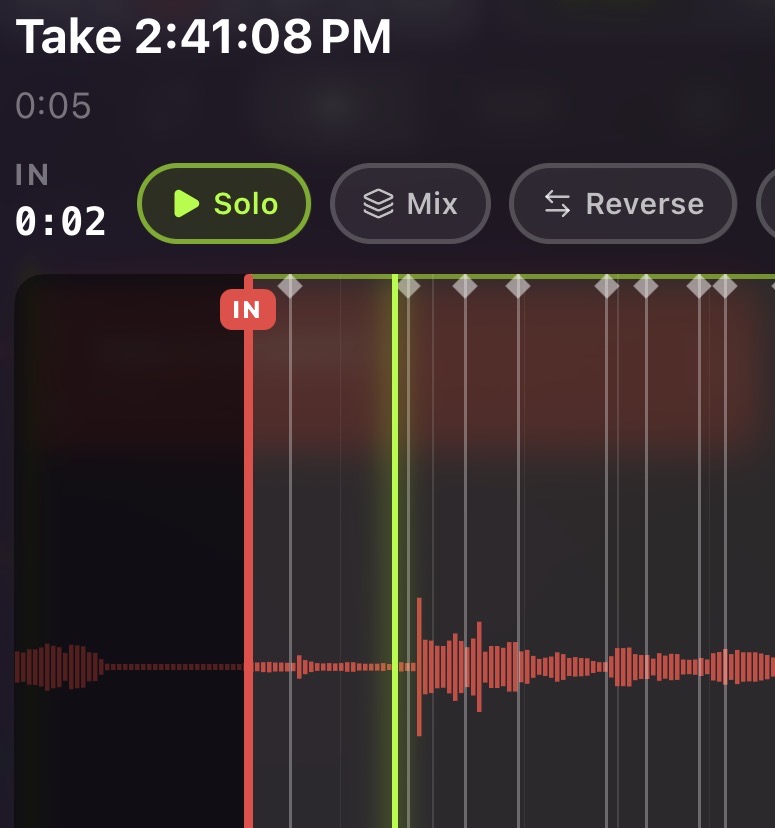
The modal shows a scrollable, zoomable waveform of the full audio file. The active region (between IN and OUT) is highlighted. Dimmed regions will not play.
- Scroll horizontally to move through the file
- Drag the IN handle (labeled “IN”) to set the start trim point
- Drag the OUT handle (labeled “OUT”) to set the end trim point
The IN and OUT times are shown in M:SS format above the waveform.
Preview Playback
Tap ▶ Solo to play just the trimmed region. A green playhead moves through the waveform as it plays. Tap again to stop.
Clip Actions
| Button | Action |
|---|---|
| Copy | Copies this clip to the clipboard without removing it |
| Cut (✂) | Copies to clipboard and removes from the timeline |
| Reverse | Reverses the clip’s audio — writes a new reversed file and swaps the clip to it, so the clip now plays backwards. Great for reverse-cymbal swells and transition effects. |
| Delete | Removes the clip (can be undone — the file is moved to quarantine and restored on Redo; see Undo & Redo) |
| Dupe | Creates a duplicate of this clip placed immediately after the original |
| Cancel | Closes the modal without applying trim changes |
| Apply | Saves the current IN/OUT points and any automation edits |
Note: Trim changes are not applied until you tap Apply. Tapping Cancel reverts to the trim points the clip had when you opened the modal.
Beat Grid Dots
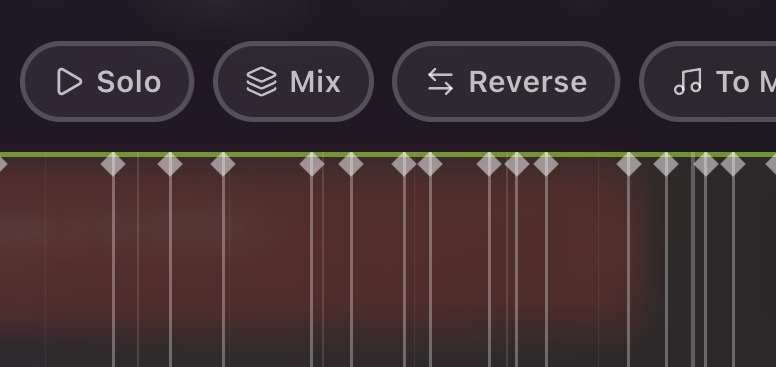
Clips display small dots along their top edge — one per 8th note. These help you visually align clips to the grid when moving them by hand.
Duplicating Clips
You can duplicate from the Clip Edit modal (Dupe button), or by copy-pasting:
- Long-press the clip → tap Copy in the modal → close the modal
- Long-press any blank area on the desired track row
- Tap Paste in the popup that appears
Pasted clips are placed at the playhead position. Cut works the same way as Copy, but removes the original clip from its track.
Clip Automation
You can draw parameter automation directly onto a clip — for example, automating a reverb wet level to fade in over the clip’s duration. This is available when an AUv3 plugin is loaded on the track.
See Automation Lanes & Shape Presets for a full guide.
Tips
- Waveform thumbnail on the timeline shows only the trimmed portion of the clip, so what you see is what will play.
- Clip name comes from the take timestamp by default. You can rename it in the Clip Edit modal (rename functionality coming soon — for now the name is the recording time).
- Clips can overlap on the same track — both will play simultaneously.